Posts

First Light Celestron CGX 1100 Edge HD
Image
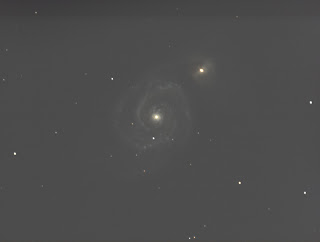
June 24, 2020: Today I was able to pick up the new Celestron CGX 1100 Edge HD. At home I immediately installed and adjusted the polar finder. Then I mounted the optics and balanced the whole thing. Then the finderscope is adjusted to the main optics. Unfortunately I didn't have the right screws to mount the StarSense. Either they were too long or too short ... When it was finally dark I had to do a manual alignment. First I aligned the polar finder as precisely as possible to the north and then carried out a 2-star alignment. For some reason, the finderscope was no longer properly aligned with the main optics. That made it very difficult to find the star with the main optics. Therefore, the whole alignment took a long time. Besides, I probably hadn't done it well either. In any case, I positioned the scope on the M 27, but saw nothing in the image field. The plate solving with Voyager also broke off and could not determine the position. Then I tried it with the M 51, which was ...

First findings

Thanks to the beautiful weather, I have been able to take a lot of photos over the past few weeks and also try out and read a lot. The pictures were reasonably ok, but I found that the stars are not really beautiful and always a bit misshapen. Since I had this phenomenon with 30s as well as with 60s or 120s exposure time, I do not think that it is a problem with the tracking. Otherwise this should have been much more pronounced at 120s exposure time than at 30s. But it wasn't. I also had various problems with editing with PixInsight. The software is extremely extensive and by far the best software for editing astro photos. But correspondingly complex, so I signed up for a course in June and hope to learn a lot there. Here is a list of what I found out during my research on the Internet: The Atik Horizon CMOS sensor is apparently not able to generate stable bias images, i.e. my procedure for preprocessing (bias, dark, partly flat, light) was wrong and therefore could not...

Komet C/2019 Y4 (Atlas)

Image
Tonight I wanted to try if I can find the comet C / 2019 Y4 (Atlas) with the telescope and if necessary can take pictures ... So first align the telescope and set up north. Then I focused with APT (Astro Photography Tools) (first with autofocus on Capella which didn't work so well and then with the Bahtinov help). Then I looked for the current coordinates of the comet on the Internet (theskylive.com/c2019y4-tracker) and aligned the telescope (with Voyager). The comet was almost immediately visible in the center of the picture. I then exposed for 60s and it was clearly visible. Comet C / 2019 Y4 (Atlas): Atik Horizon OSC 60s, unprocessed photo Comet C / 2019 Y4 (Atlas): Atik Horizon OSC 5 x 60s, processed with PixInsight

Orion Nebula January 21, 2020

Image
On January 21st I wanted to try the new heating tape to see if the optics still fog up after a short time. So I connected it to the SteelDrive II and aligned the telescope with the Orion nebula. I then took 144 pictures with 30s exposure time each. In the good 70 minutes, the optics only fogged up slightly, without a heating tape it was fogged up every 15 to 20 minutes. The stacked live image of the Atik Inifity software already looked pretty good. Orion Nebula: 144 images 30s stacked with Atik Infinity software I then edited the images with PixInsight. This means preprocessing with biases and darks, then stacked, photometric color correction and then a histogram transformation. Orion Nebula: The same images edited with PixInsight The difference is clearly visible. However, a lot would still be possible. But PixInsight is so extensive and complex that I still have to practice a little. You can also see the vignetting of the optics, so next time I have to work with ...

Voyager

Voyager is a software to simplify and automate astrophotography. This allows the entire equipment to be controlled and programmed by a PC. This makes it easy to make long recording sequences fully automatic. 4.12.2019: 1st attempt Installing the software was easy. However, there were problems with the connection to the telescope and the SteelDrive Focuser. Despite various efforts, I did not get it up and running. Even the software supplied by Baader Planetarium SteelGo could not connect to the SteelDrive. SteelDrive was recognized in the selection but when connecting it there was a timeout and the connection did not succeed. 8.12.2019: Firmware update I received a new firmware from Baader Planetarium support. After upgrading the SteelDrive II firmware, the SteelDrive II Focuser worked with the SteelGo software without any problems. Therefore, I thought that updating the Celestron firmware could also be useful. The update worked without an error message, but the telescope could n...

Baader SteelTrack/SteelDrive

Image
On 4 July 2019 the package arrived with the SteelTrack/SteelDrive II. Of course I assembled it immediately and mounted it on the telescope. According to the weather forecast it should be clear tonight. I will set up everything early and focus the NexImage on a mountain. Unfortunately I had not managed to find the focus with the NexImage. Shortly before it got dark I mounted the Atik Horizon. Focusing is much easier with the Steeltrack/Steeldrive if you don't have to touch the telescope anymore. However, the seeing was relatively bad and therefore it was almost impossible to take really sharp pictures. The images looked very good with 0.01s exposure time, but the Infinity software makes some changes to the histogram. On the PC afterwards I saw that the images were not really well exposed. Next time I will try a bit more. But here now a first picture of Jupiter. It is a single image without any editing:

Dumbbel Nebula M27 at 17.6.2019

Image
Although it was almost full moon I wanted to photograph some objects. I wanted to photograph the Dumbbell Nebula M27, the Cat's Eye Nebula and the Owl Nebula. With the Cat's Eye Nebula I couldn't see any details, it was probably just too bright. With the Owl Nebula you can see a little bit and with the Dumbbell Nebula a little bit more. The photo was preprocessed with PixInsight, then color corrected and a histogram transformation was done. Otherwise no further processing was done. M27 - Dumbbell Nebula: